Add an IDX Search Form to Webflow
The exact clicks for putting an IDX search form on a Webflow page, from copying the widget code to publishing the site.
Written by IDX Plugin, an independent IDX Broker Developer Partner, not affiliated with IDX Broker.
On this page
In short
- Any search form layout runs on your published Webflow site.
- The gray box in the Designer becomes the form when live.
- Change fields or styling later without touching Webflow.
- Needs a paid Webflow plan and a free IDX Plugin account.
The search form on a Webflow page is one task from IDX Plugin for Webflow. Any layout from Search Forms, Every Layout Explained works here, and the embed steps are the same for each. You need a Webflow project on a paid plan, plus a free IDX Plugin account with your IDX Broker API key added, because that is where the embed code lives.
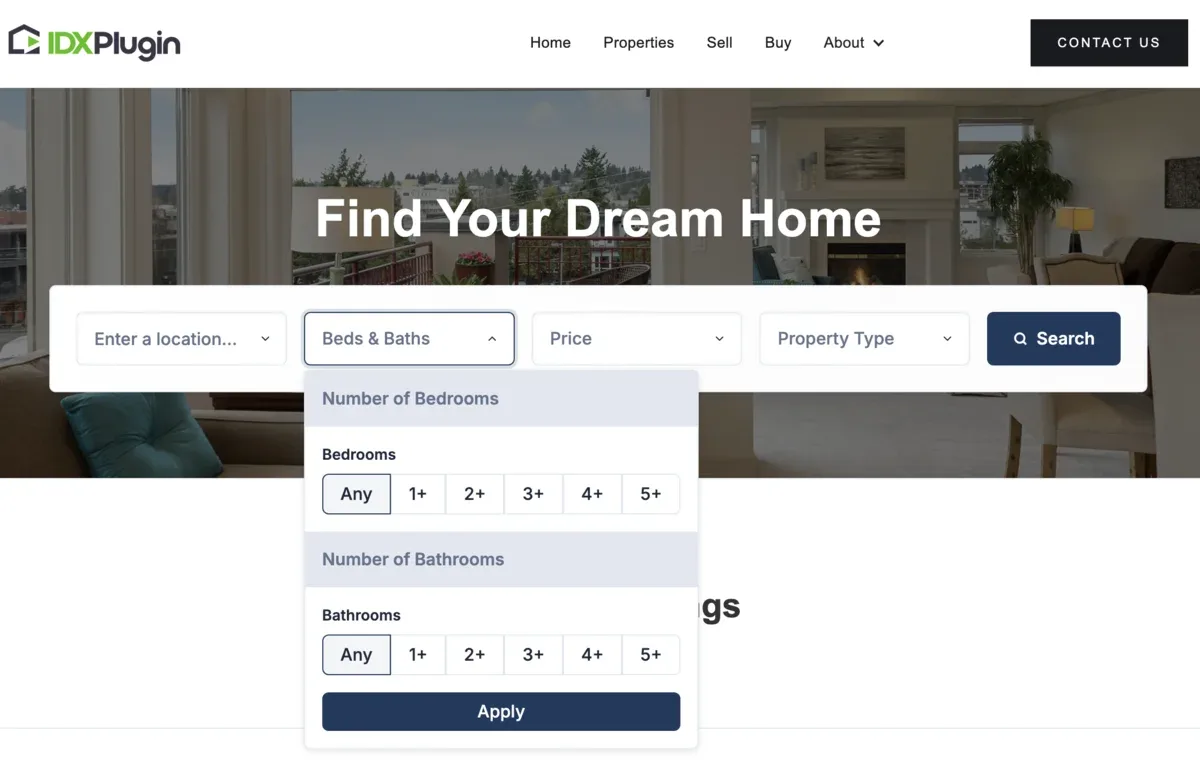
Here is the form itself, running live on our demo IDX Broker account. Your own embed picks up your styling.
Embed the form on your page
-
1
Pick your widget
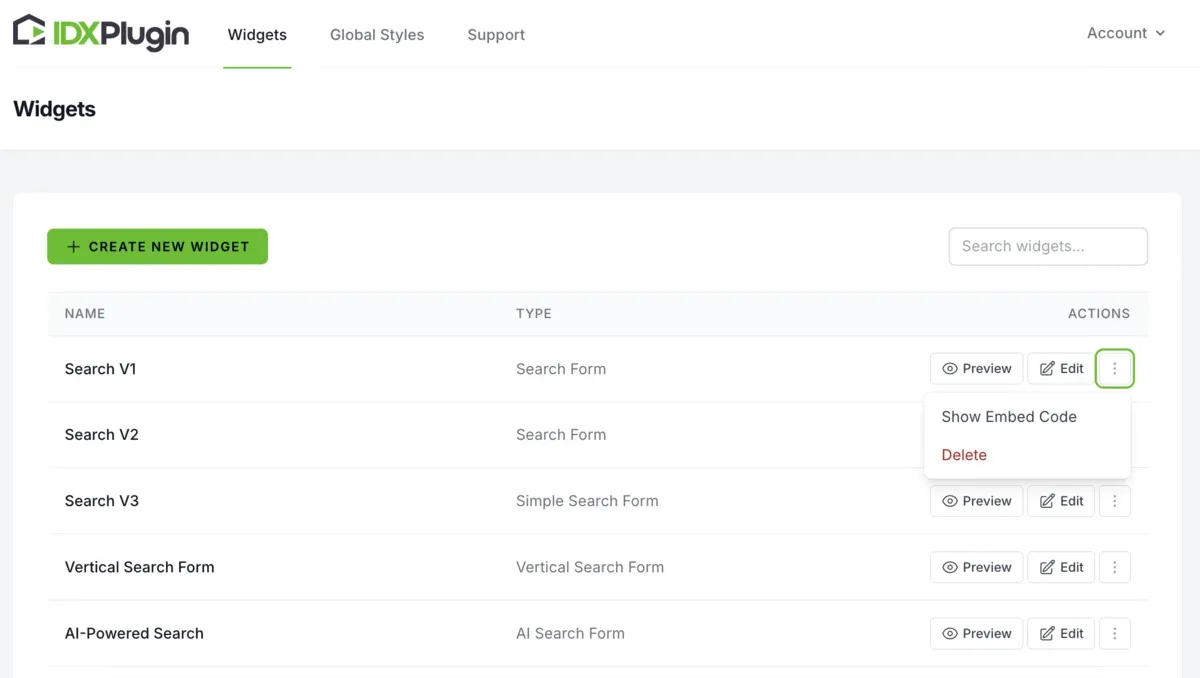
Log in to your IDX Plugin dashboard. Find the search form widget you want and click Show Embed Code.
-
2
Copy the code
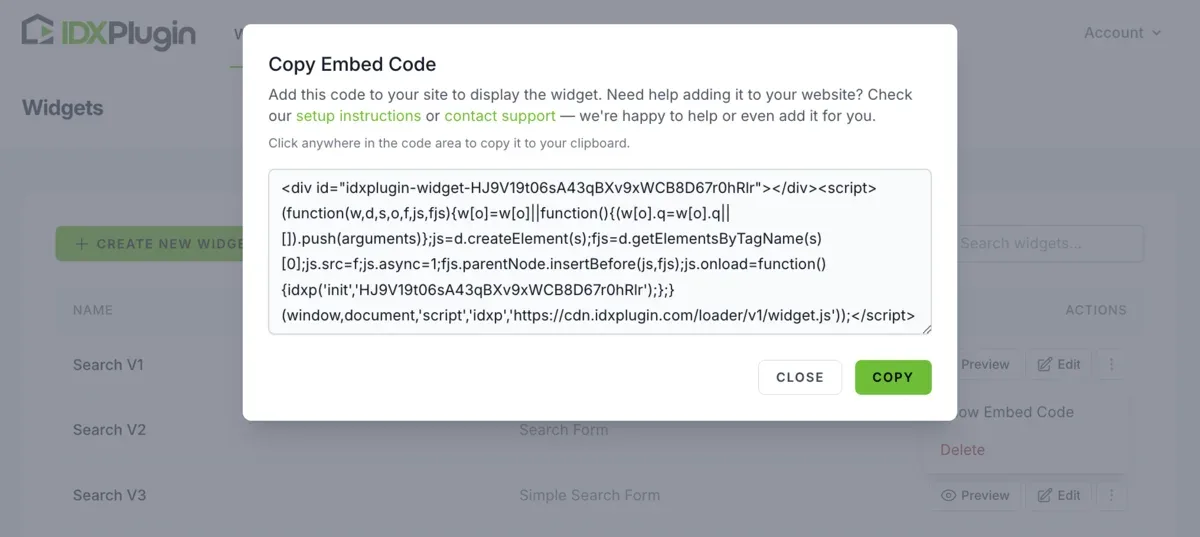
Copy the generated code from the popup.
-
3
Open the page in Webflow
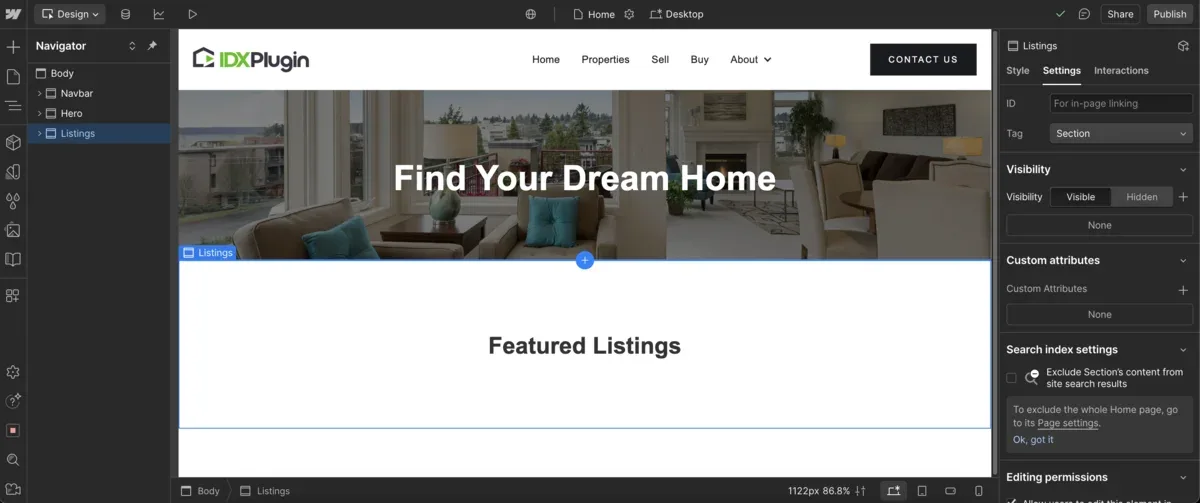
Open Webflow and select the page where you want the search bar, usually the homepage.
-
4
Add the Code Embed element
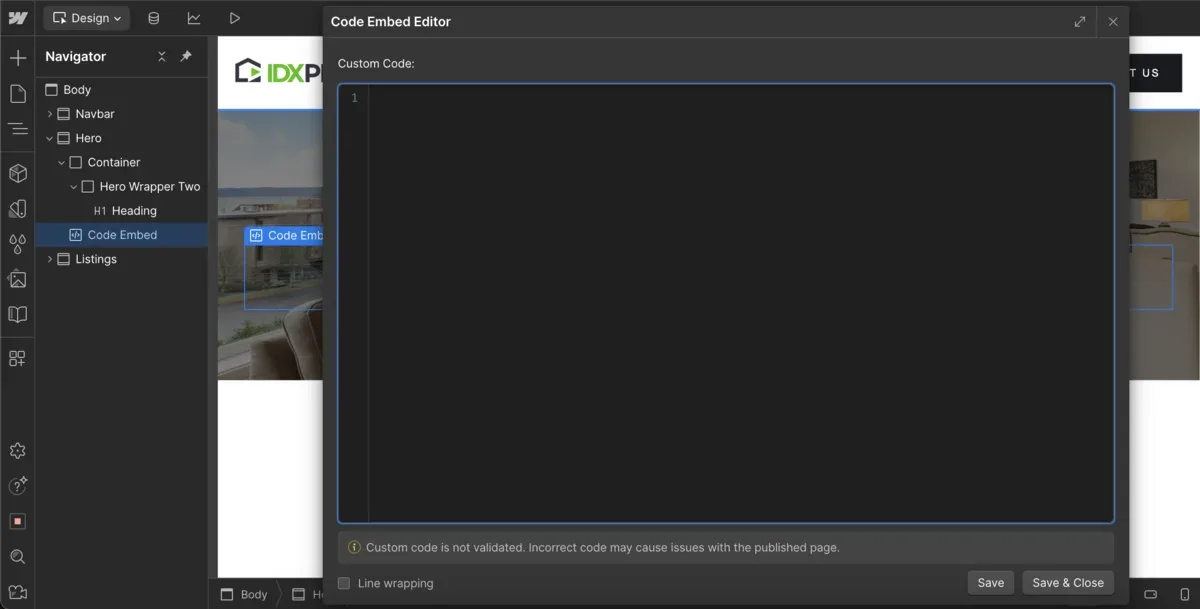
In the Elements Panel, search for Code Embed and drag it into the section where the search bar should appear.
-
5
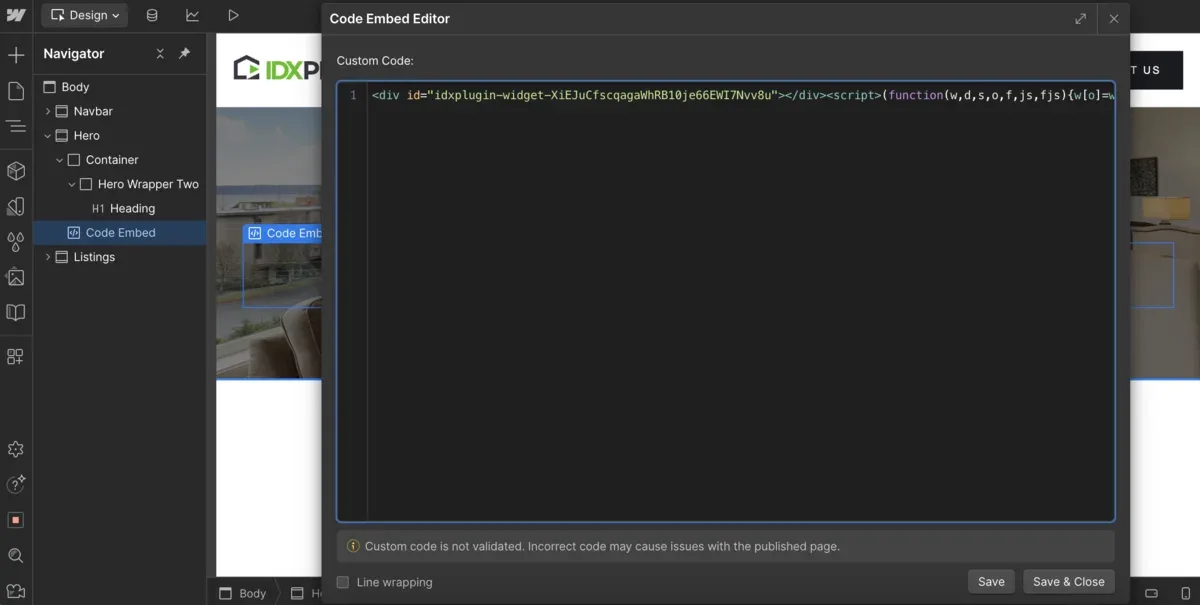
Paste the code
Paste the code you copied from IDX Plugin into the element's code area.
-
6
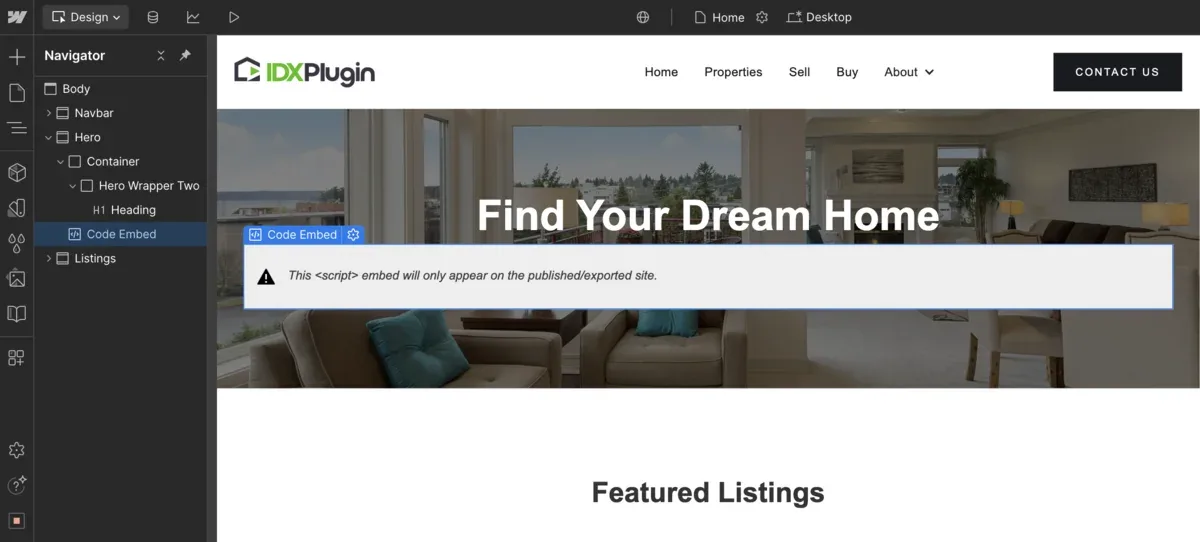
Don't mind the gray box
Webflow shows a gray placeholder in the Designer. That is normal, the search form appears on your published site.
-
7
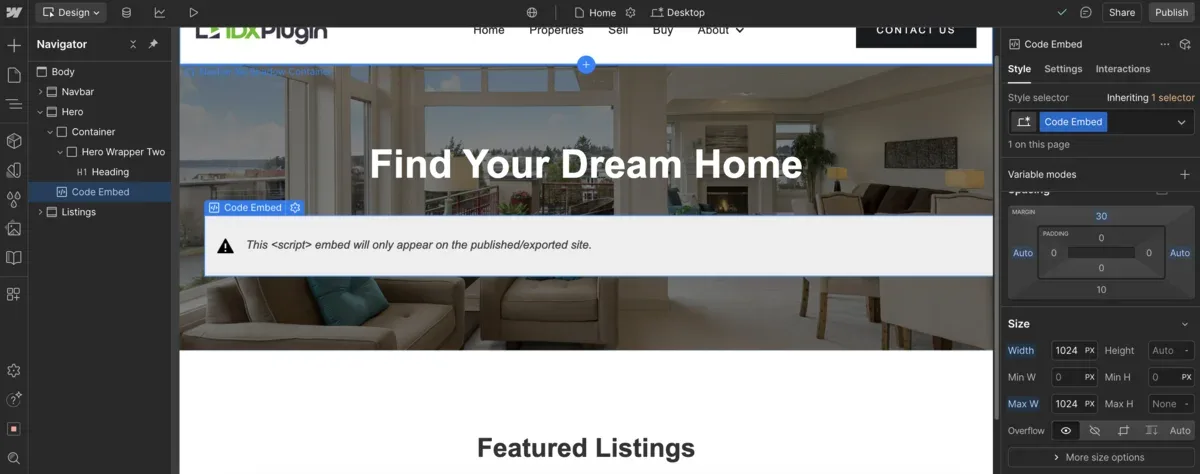
Adjust the layout
Use Webflow's layout tools to control spacing and alignment. Centering the widget and limiting the width to around 1024px keeps it clean and balanced.
-
8
Publish and test
Click Publish, then Publish to selected domains, and open the live site. Start typing a location, the autocomplete covers Address, City, County and Postal Code.
Change the form without touching Webflow
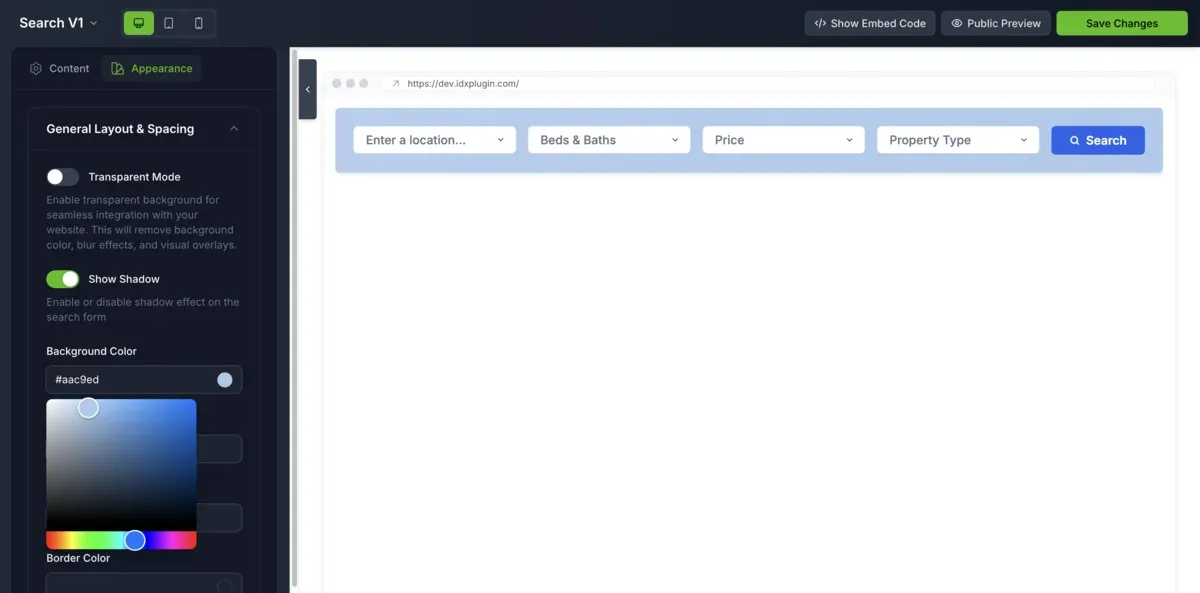
Field order, removed fields and styling all live in your dashboard, not in the embed. Click Edit on the widget, adjust it in the visual editor, and the published form updates on its own, with no re-pasting in Webflow.
Where the search sends visitors
Every search leads to the pages generated from your IDX Broker account: results, single listings, lead forms. Giving them your Webflow navigation and footer is its own task, covered in Show IDX Pages with Your Webflow Navigation and Footer, and our IDX Broker templates handle the layout inside. You can see the search form live on our demo site.
Already on IDX Broker?
Create a free IDX Plugin account, add your IDX Broker API key and your search forms are ready to embed, styled to your brand. If you prefer, tell us where the form should go and we place it for you.
Get the widgets, it's free No extra invoice. You only pay IDX Broker.